D'Addario's Sound Advice
A Guitarist’s Guide to the
CAGED System
What is the CAGED System?
The CAGED system is based on the idea that these five chord shapes can be moved up and down the neck of the guitar to play the same chord in different positions. This helps guitarists understand the relationship between chords and scales across the fretboard.
The Chord Shapes
The CAGED system builds on basic open chord shapes:
- C Shape: This is the open C major chord. When moved up the neck, it forms barre chords.
- A Shape: This is the open A major chord. It can be shifted up the neck to create different major chords.
- G Shape: This is the open G major chord. It’s less commonly used as a barre chord but is still part of the system.
- E Shape: This is the open E major chord. It’s one of the most commonly used shapes for barre chords.
- D Shape: This is the open D major chord. It can be moved up the neck to form different chords.
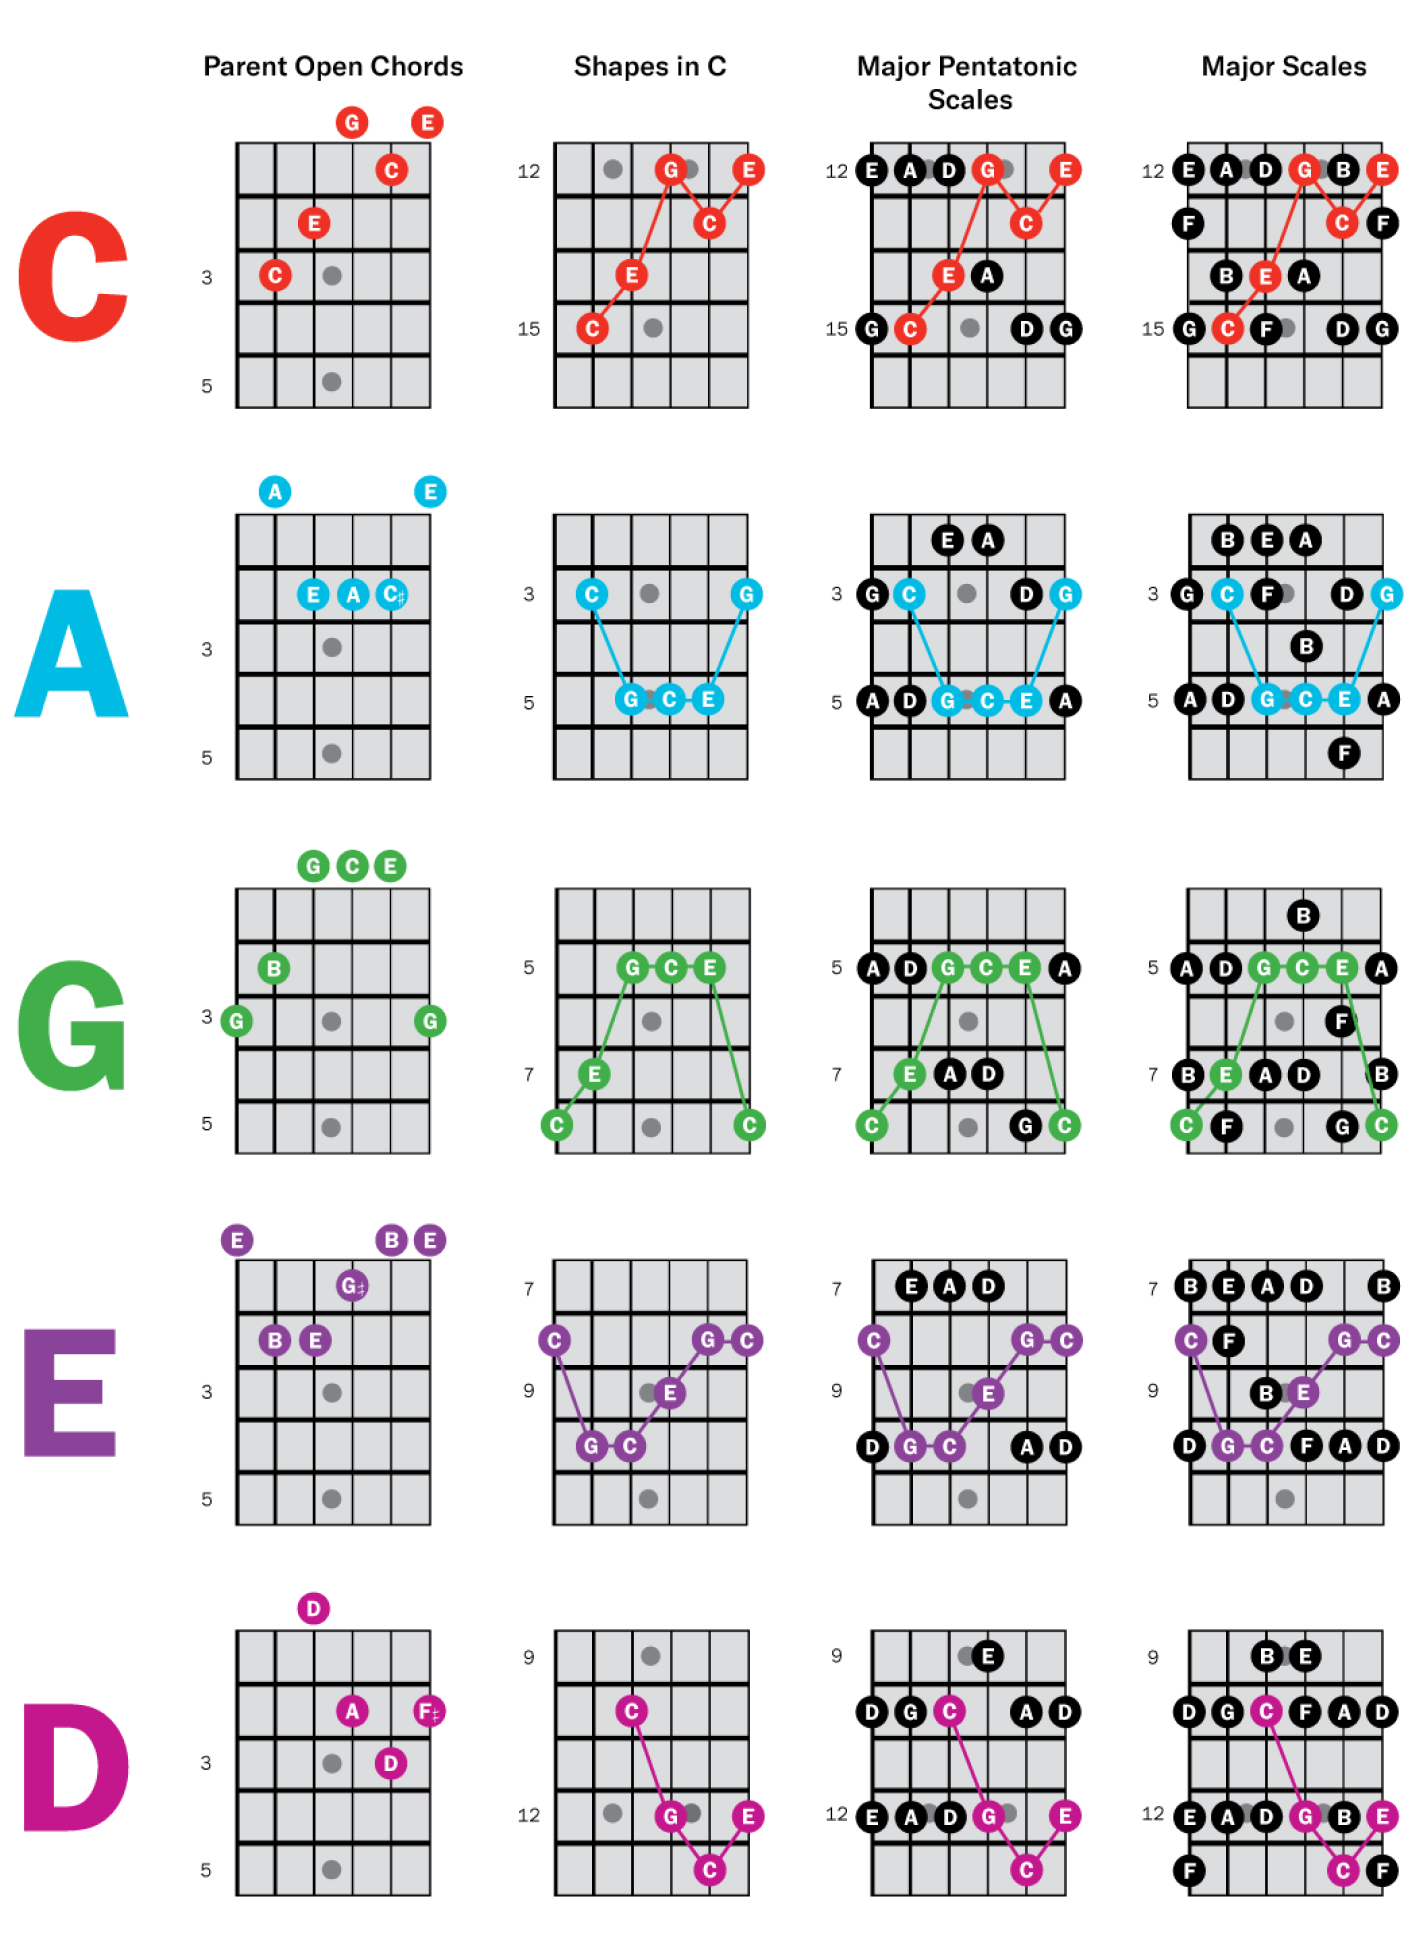
Chords Linked Up
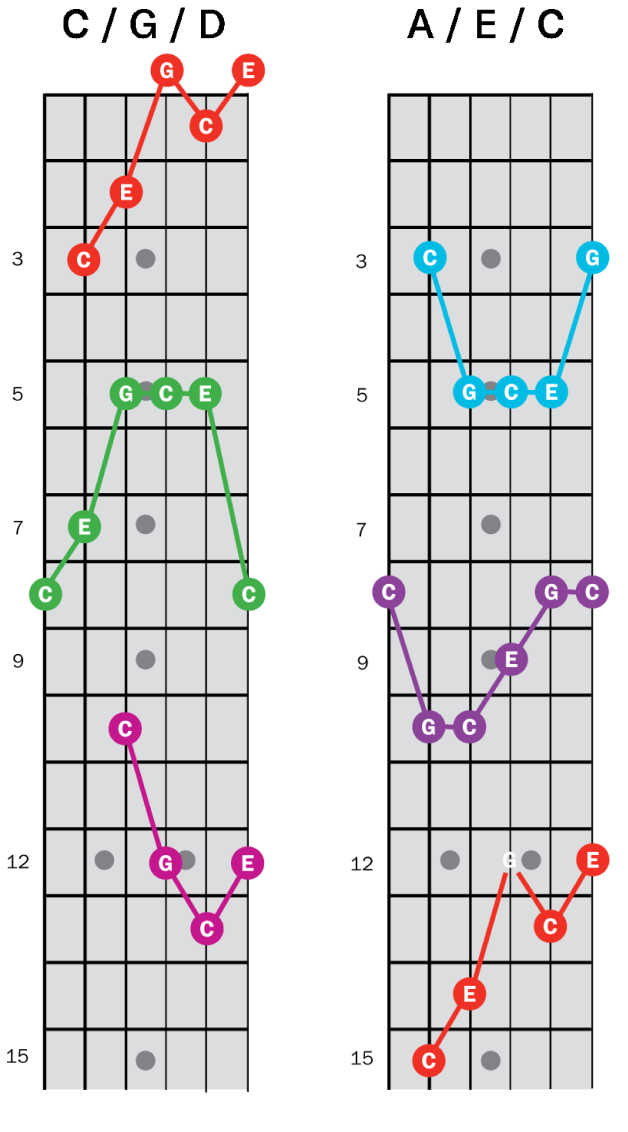
How to Play C, A, G, E, and D chords
C Major Chord
- Fingers:
- Index finger on the 1st fret of the B string (2nd string).
- Middle finger on the 2nd fret of the D string (4th string).
- Ring finger on the 3rd fret of the A string (5th string).
- Strum: Strum from the A string (5th string) down to the high E string (1st string). Do not play the low E string (6th string).
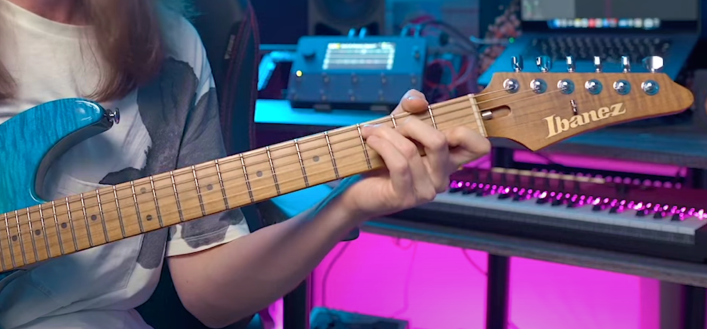
A Major Chord
- Fingers:
- Index finger on the 2nd fret of the D string (4th string).
- Middle finger on the 2nd fret of the G string (3rd string).
- Ring finger on the 2nd fret of the B string (2nd string).
- Strum: Strum from the A string (5th string) down to the high E string (1st string). Do not play the low E string (6th string).
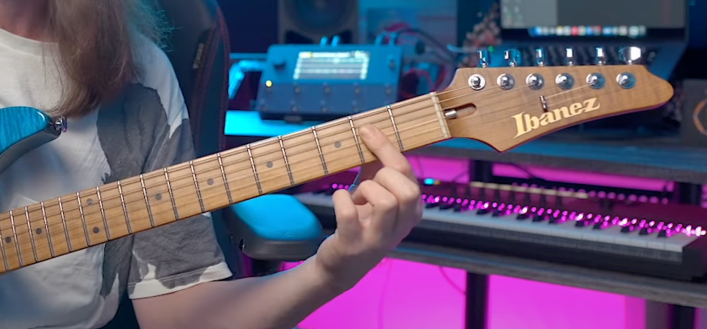
G Major Chord
- Fingers:
- Middle finger on the 3rd fret of the low E string (6th string).
- Index finger on the 2nd fret of the A string (5th string).
- Ring finger on the 3rd fret of the B string (2nd string).
- Pinky finger on the 3rd fret of the high E string (1st string).
- Strum: Strum all six strings.
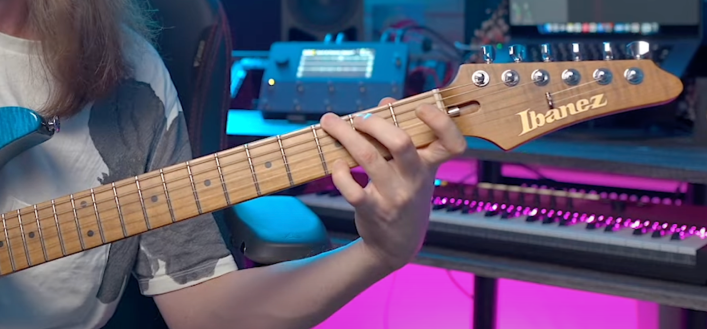
E Major Chord
- Fingers:
- Index finger on the 1st fret of the G string (3rd string).
- Middle finger on the 2nd fret of the A string (5th string).
- Ring finger on the 2nd fret of the D string (4th string).
- Strum: Strum all six strings.
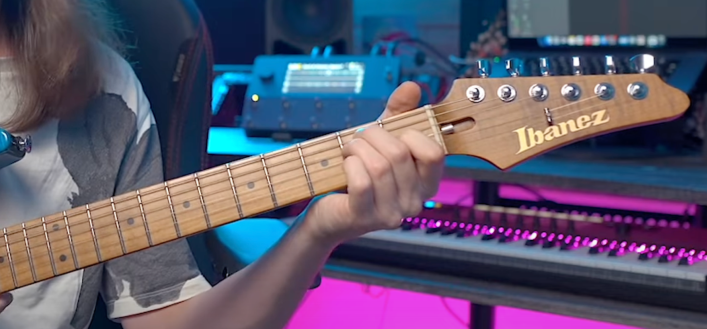
D Major Chord
- Fingers:
- Index finger on the 2nd fret of the G string (3rd string).
- Middle finger on the 2nd fret of the high E string (1st string).
- Ring finger on the 3rd fret of the B string (2nd string).
- Strum: Strum from the D string (4th string) down to the high E string (1st string). Do not play the low E string (6th string) or the A string (5th string).
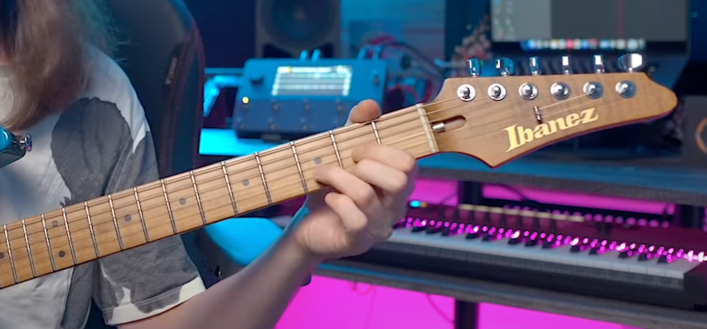
Chord Transitions
Transitioning between the CAGED chord shapes smoothly is essential for mastering the system and improving your overall guitar playing. Here are some tips and exercises to help you with CAGED chord transitions:
- C Shape transitions to A Shape
- A Shape transitions to G Shape
- G Shape transitions to E Shape
- E Shape transitions to D Shape
- D Shape transitions back to C Shape
Tips for Practicing the CAGED System
1. Finger Placement: Ensure your fingers are pressing down on the strings just behind the frets to get a clear sound.
2. Strumming: Practice strumming slowly and evenly, making sure each string rings out clearly.
3. Transitioning: Practice transitioning between these chords smoothly. Start slowly and gradually increase your speed as you become more comfortable.
Common Mistakes to Avoid
Practicing the CAGED system can be incredibly beneficial, but there are some common mistakes that guitarists often make. Here are a few to watch out for:
1. Rushing Through Transitions
- Mistake: Trying to move too quickly between chord shapes without ensuring accuracy.
- Solution: Slow down and focus on smooth, accurate transitions. Speed will come with time and practice.
2. Poor Finger Placement
- Mistake: Not placing fingers close enough to the frets, leading to buzzing or muted notes.
- Solution: Place your fingers just behind the frets and press down firmly to get a clear sound.
3. Ignoring Barre Chords
- Mistake: Avoiding barre chords because they are challenging.
- Solution: Practice barre chords regularly. They are essential for moving the CAGED shapes up the neck.
4. Lack of Visualization
- Mistake: Not visualizing the chord shapes and their positions on the fretboard.
- Solution: Spend time visualizing the shapes and how they connect across the fretboard before playing.
5. Inconsistent Practice
- Mistake: Practicing inconsistently, which hinders progress.
- Solution: Practice regularly, even if it’s just for a few minutes each day. Consistency is key.
6. Not Using a Metronome
- Mistake: Practicing without a metronome, leading to uneven timing.
- Solution: Use a metronome to keep a steady pace and improve your timing.
7. Neglecting Other Techniques
- Mistake: Focusing solely on the CAGED system and neglecting other important techniques.
- Solution: Balance your practice routine by including scales, arpeggios, and other techniques.
8. Overlooking Theory
- Mistake: Not understanding the theory behind the CAGED system.
- Solution: Learn the theory behind the system, such as how the shapes relate to scales and chord progressions.
9. Poor Posture and Hand Position
- Mistake: Having poor posture or incorrect hand position, leading to strain and discomfort.
- Solution: Maintain good posture and proper hand position to avoid strain and play more comfortably.
10. Not Seeking Feedback
- Mistake: Practicing in isolation without seeking feedback.
- Solution: Get feedback from a teacher, mentor, or even through recording yourself and listening back.
By being mindful of these common mistakes and actively working to avoid them, you’ll make more effective progress with the CAGED system.

