How To Tune
A 12-String Guitar
A comprehensive guide on how to tune a 12-string guitar.
Step 1: Understanding 12-string tuning

The standard tuning for a guitar is E-A-D-G-B-E, starting from the thickest string (low E) to the thinnest string (high E). Each string is associated with a specific note. It’s easy to remember with a little mnemonic – Eddie Ate Dynamite, Good Bye Eddie! On a 12 string, each of those notes is doubled in what we call ‘pairs’ or ‘courses’. The lowest 4 strings (E,A,D,G) all feature a second string an octave higher – this gives the 12 string it’s signature shimmering sound. The last two strings (B,E) are simply doubled without any intentional pitch variation in the pairs. Modern string technology is not advanced enough to provide octave strings for either the B or E.
Step 2: Use a Reference Pitch

You can tune your guitar by ear, but to be in tune with others you'll want to start with a reference pitch. While an electronic tuner is the best method for consistent and exact tuning, you should be at least familiar with how to do this process by ear. A reference pitch can be obtained from a tuning fork, a smartphone app, or another instrument like a keyboard. If you’re not comfortable tuning by ear yet, you can use a headstock tuner which will sense the notes and tell you what you’re playing!
Step 3: Tune the Low E (6th) Pair

Start by tuning the lowest-pitched pair, the low E strings. If you have a piano or another tuned reference instrument, use it to tune the low E string of the 12-string guitar to E2. Otherwise, use your tuner and pluck the thickest E string, adjusting its tension until it matches the desired pitch. Adjust the tension of the string by turning the corresponding tuning peg until the pitches match. Use your ears to discern whether the string needs to be tightened, raising the pitch, or loosened, lowering the pitch. One you’ve tuned the low string, you can play the pair and tune the high string until they match to get them to match. The thinner string will be the same note as the thicker string at the 12th fret. If you need a clever way to play one string at a time, try muting one with your fret hand while you strum them both, or put your pick in-between the strings and pluck up or down to hit only one string.
Step 4: Tune the A String pair

Place your finger on the fifth fret of the E strings. Pluck the open A string, the next thickest, and adjust its tension to match the reference pitch of the low E at the 5th fret. Ensure that the pitch is the same between strings. Once your low strings are aligned, you can strum the A string pair to match them together.
Step 5: Tune the D String

Place your finger on the fifth fret of the A string. Pluck the open D string, the next thickest, and adjust its tension to match the reference pitch of the A at the 5th fret. Ensure that the pitch is the same between strings. Once your low strings are aligned, you can strum the D string pair to match them together.
Step 6: Tune the G String

Place your finger on the fifth fret of the D string. Pluck the open G string, the next thickest, and adjust its tension to match the reference pitch of the D at the 5th fret. Ensure that the pitch is the same between strings.
Step 7: Tune the B String

This one mixes things up! Place your finger on the fourth fret of the G strings. Pluck the open B strings, the next thickest, and adjust its tension to match the reference pitch of the G at the 4th fret. Ensure that the pitch is the same between strings. Once either string is in tune aligned, you can strum the B string pair to match them together.
Step 8: Tune the High E String
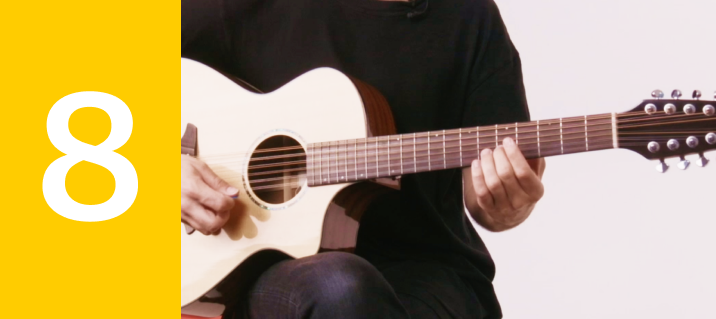
I know that switch up was crazy, but rest assured we’re back to our old ways now. Place your finger on the fifth fret of the B string. Pluck the open high E string, the thinnest, and adjust its tension to match the reference pitch of the B at the 5th fret. Ensure that the pitch is the same between strings.
Step 9: Check for Accuracy and Fine-Tune

After tuning all six pairs, go through them again to ensure accuracy. Strum the guitar gently and listen for any inconsistencies in pitch. Make any necessary adjustments by tuning the strings that are out of tune until the entire instrument sounds harmonious.
Step 10: Stretch and Settle the Strings
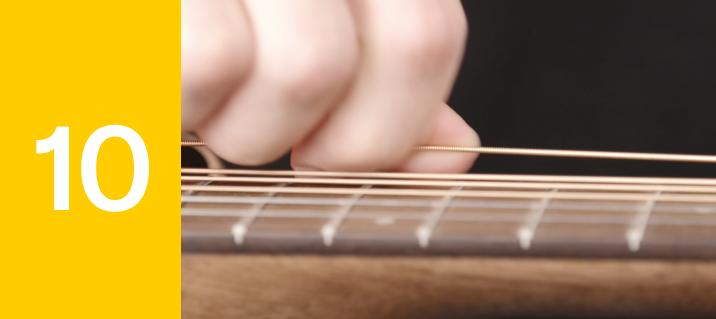
Once you have completed the tuning process, gently stretch the strings by pulling them away from the fingerboard. This helps the strings settle into their tuned positions more quickly. Retune the strings one final time, as they may have shifted during that process. Contrary to common belief, you’re not stretching the metal as much as you’re assuring the strings are seated right at the bridge, tuners, and nut. Don’t overdo it or you can break strings. Congrats, you’re done!
How To Tune With A Tuner

When using a tuner, you are able to get an exact read out of what specific note the string is tuned to. Since 12-string guitars are tuned to the same notes as a 6 string, you'll want to tune your 12-string to EE AA DD GG BB EE - but they're not all the same notes! The lower 4 strings are all paired in octaves, and the top two are unisons. When taking the octave number into consideration, a 12-string guitar is tuned E2E3 A2A3 D3D4 G3G4 B3B3 and E4E4. Using a tuner, you can check for these until your ear is trained enough to just hear it.
How To Tune A 12-String Guitar Down A Half Step

If you've tuned a 6-string guitar down a half step, you can tune a 12-string down a half step too. Using a tuner or reference pitch bring the E down to and Eb and then tune the paired string an octave high to match. Repeat this for the other 5 courses and you're ready to go! EbAbDbGbBbEb
How to Tune Drop D

Drop D is a popular guitar tuning where you bring the low E string down to a D string, giving you two more notes and new chord shapes to play. A 12 string guitar is no different - just bring that low E pair down to a D and you're ready to go. A quick and easy way to do this is to get the low string to match the other D string already on your guitar. The 12 fret of the low D will match the pitch of the open D or 4th string.
Conclusion
Tuning your guitar is the foundation of great playing. By following this step-by-step guide, you can ensure that your guitar is ready for anything. Remember to practice your ear training skills to develop a better sense of pitch. Keep in mind that regular tuning is essential to playing in harmony with yourself and others. With practice and experience, tuning your guitar will become second nature to your playing.