How To Tune A Guitar
A comprehensive guide on how to tune a guitar.
![]()
3:36
How To Tune A Guitar
Tuning a guitar is a fundamental skill that will serve every guitarist well for a lifetime of playing. A well-tuned guitar ensures accurate pitch, harmonious chords, and a more musical playing experience. Whether you're a beginner or an experienced player, this article will provide you with a step-by-step guide on how to tune your guitar.
Step 1: Understand Standard Tuning
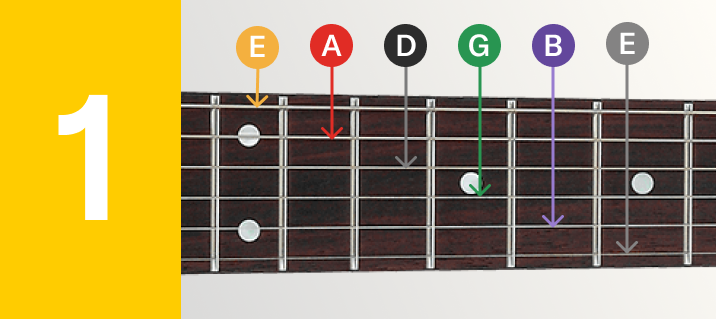
The standard tuning for a guitar is E-A-D-G-B-E, starting from the thickest string (low E) to the thinnest string (high E). Each string is associated with a specific note. It’s easy to remember with a little mnemonic – Eddie Ate Dynamite, Good Bye Eddie!
Step 2: Use a Reference Pitch

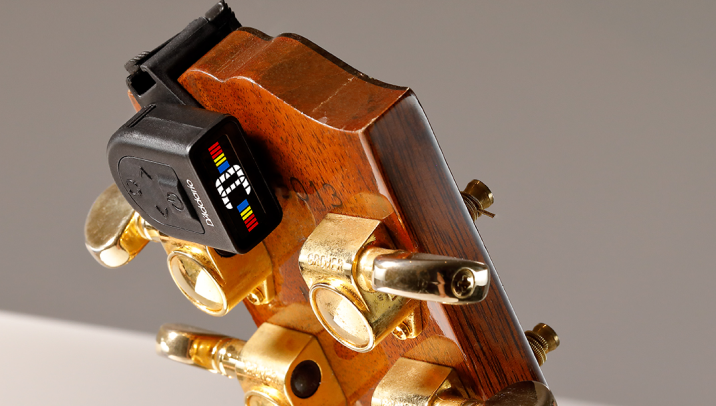
You can tune your guitar by ear, but to be in tune with others you'll want to start with a reference pitch. This can be obtained from an electronic tuner, a tuning fork, a smartphone app, or another instrument like a keyboard. If you’re not comfortable tuning by ear yet, you can use a headstock tuner which will sense the notes and tell you what you’re playing!
Step 3: Tune the Low E String
Start by playing the low E string, the thickest string, open. In this case, open means you’re not pressing the string against any frets. Pluck the string and compare the sound with the reference pitch’s low E. Adjust the tension of the string by turning the corresponding tuning peg until the pitches match. Use your ears to discern whether the string needs to be tightened, raising the pitch, or loosened, lowering the pitch. .
Step 4: Tune the A String

Place your finger on the fifth fret of the E string. Pluck the open A string, the next thickest, and adjust its tension to match the reference pitch of the low E at the 5th fret. Ensure that the pitch is the same between strings.
Step 5: Tune the D String

Place your finger on the fifth fret of the A string. Pluck the open D string, the next thickest, and adjust its tension to match the reference pitch of the A at the 5th fret. Ensure that the pitch is the same between strings.
Step 6: Tune the G String

Place your finger on the fifth fret of the D string. Pluck the open G string, the next thickest, and adjust its tension to match the reference pitch of the D at the 5th fret. Ensure that the pitch is the same between strings.
Step 7: Tune the B String

This one mixes things up! Place your finger on the fourth fret of the G string. Pluck the open B string, the next thickest, and adjust its tension to match the reference pitch of the G at the 4th fret. Ensure that the pitch is the same between strings.
Step 8: Tune the High E String

I know that switch up was crazy, but rest assured we’re back to our old ways now. Place your finger on the fifth fret of the B string. Pluck the open high E string, the thinnest, and adjust its tension to match the reference pitch of the B at the 5th fret. Ensure that the pitch is the same between strings.
Step 9: Check the Overall Tuning

After tuning each string individually, strum all the strings together and listen for any inconsistencies. Make any necessary adjustments using the tuning pegs until all the strings sound in harmony. If you make a regular habit out of checking with a few consistent chords or riffs after each time you tune, you’ll train your ear to catch discrepancies.
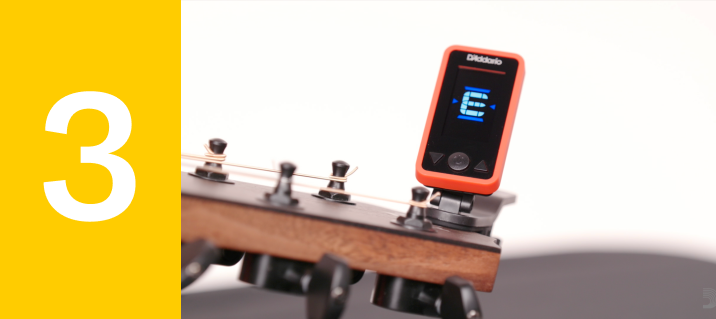
How To Tune With A Tuner
When using a tuner, you are able to get an exact read out of what specific note the string is tuned to. The standard tuning for a guitar is E A D G B E, with each note being higher than the last. Using a tuner, you can play a note and the screen will read out what note it hears. Reference your tuner's manual for exact details but typically the screen will display movement to the left if it is flat, or tuned to low, and to the right, or sharp if it is too high. When you are in tune a central marker will indicate along with the note displayed. Using a tuner, you can check for these until your ear is trained enough to just hear it.
How Do I Keep My Guitar In Tune Longer?
1. Make sure your strings are settled when you install them by gently pulling them from the 12th fret so that they are not caught on anything at the tuner or at the bridge. This is often called 'stretching' but you're not actually stretching the metal - you're setting the string into place.
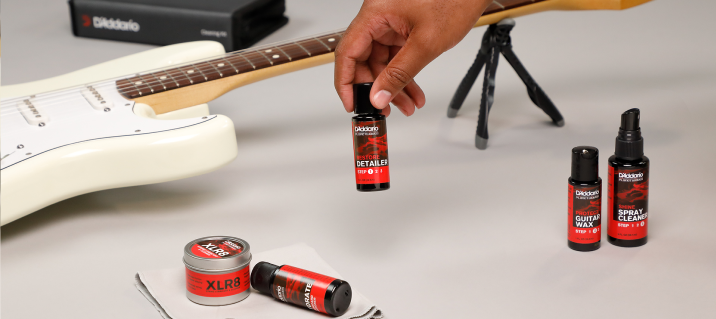
2. Use a string lubricant like the D'Addario Lubrikit on the nut slot, or draw in the nut slot with a graphite pencil to assure the strings to not bind to the nut and cause sticking strings that prevent easy tuning.
3. Keep your strings fresh! With time, all things wear out. It is a miracle guitar strings even work in the first place - try keeping 20 pounds of tension on any other material that is .009 thick, while also being perfectly symmetrical, and in tune as you make it shorter.
Guitar strings can lose their intonation with age, bend on frets, or be damaged from our hand's natural oils and particles. Wash your hands before you play, and use a microfiber cloth after each play session, along with the occasional string cleaning with a solution like D'Addario XLR8 and you'll get a lot more life out of your strings.
4. Make sure your bridge is set up right - if you are using a vibrato system (AKA a whammy bar) make sure that your bridge or tail piece is balanced and working right or else you will go out of tune when playing. See a guitar tech if you are experiencing problems - any major vibrato system can be made to work right with the correct care.
Conclusion
Tuning your guitar is the foundation of great playing. By following this step-by-step guide, you can ensure that your guitar is ready for anything. Remember to practice your ear training skills to develop a better sense of pitch. Keep in mind that regular tuning is essential to playing in harmony with yourself and others. With practice and experience, tuning your guitar will become second nature to your playing.